How did Pacific Elementary School start a Makerspace?
|
It started with an IDEA shared by our principal. It took one parent hearing that idea and running with it.
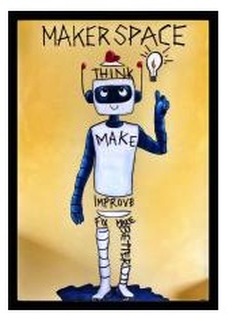
This is where we began our journey.... STEP ONE: We defined our program goals for an elementary school, specifically our school. Here are the parameters that we set: What is Makerspace? Hands on, student-directed learning. In Makerspace you can build projects using a variety of materials. You could make a simple machine, sew a project, power lights and buzzers, or explore with pulleys and weights. In Makerspace you learn by doing, trying, investigating. Pacific’s Makerspace is open to ALL 3rd, 4th, and 5th students, with plans to extend the program to 1st and 2nd grade students soon. STEP TWO: Passion. Simply put, a vision to MAKE it happen in any form (large or small scale). STEP THREE: We gathered and recruited a Makerspace committee. You know who those people are that will go the distance. Find them (they usually are the busiest people you know). Have them take on a role that interests them/appeals to their skill set. Find parents with experience in education, art, engineering as well as those with a passion for tinkering who are willing to learn. Try not to take no for an answer. STEP FOUR: Research Resources - "What is a Makerspace?" video. - Visit Trash for Teaching for Makerspace concept introduction. - Read Invent to Learn by Sylvia Libow Martinez & Gary Stager. and Makerspace Playbook, School Edition - Visit PBS Design Squad amazing yet simple projects. STEP 5: Curriculum Plan of simple projects. We started with one grade level on one day a week as a test program and then expand to the demands. We tried to choose one theme and build on it over a few sessions to help facilitate deeper understanding of the topic. - bristle bots - marble runs - simple circuits - etc. STEP SIX: PR We needed to get the word out to our parents and students about who, what, when, why, and how this all works. We used clear, simple communication with our parents and students. STEP 7: Parent Volunteers We recruited parents for all types of roles from figuring out how to get the supplies to teaching the projects to the children and everything in between. Sign Up Genius helped organized our parent volunteers. Parent Orientation Video STEP 8: Money (and alternates to money) - We set out to make the most of our limited funds (PTA/most likely, MBEF/in the future?, grant funding/TBD) - And, we always try to get what we need for FREE from our school community or from larger community resources STEP 9: Constant Evaluation - How to improve the lesson just taught. - What worked. - What did not work. - Age appropriateness in relationship to technical skills. There can be different ways to teach the same lesson to span the age groups. STEP TEN: TO BE INSPIRED SO WE CAN INSPIRE OUR KIDS By: Julie Johnson & Cathy Hobart |
